Importing Transactions Into Money Pro
Money Pro offers a CSV Import feature to help you efficiently upload transactions that cannot be automatically imported. However, if you experience issues with your CSV file not importing correctly, follow the guidelines below to troubleshoot and complete the process successfully.
Note: It is best if you are able to link your business bank accounts and credit cards to Money Pro so that you are able to automatically import your transactions: see details here.
Creating the CSV file for import
Download a list of transactions from your bank for import
When you are on your bank's dashboard, you may be able to navigate to your transactions and then filter your transactions by time or keyword to get the list of business transactions that you want to import. You then may be able to download the list of transactions as a CSV.
An example here is with Chase Bank
We are seeing "Download Account Activity" next to the account transactions

After clicking the download button, we are able to select the file type: CSV and in Activity we are able to select how many transactions to download.

Create the CSV from scratch
You can use this template to help jumpstart your CSV import process: Money Pro Expenses Template.xlsx
- You can download the template and then import into Google Sheets and make changes there.
- The Template tab is going to be a simple and easy way to start. You can see an example of how we've used that template in the example tab to the right of the template.
- In the video on this FAQ, I'll show you how I upload this template into Money Pro.
- I've also included an example of a Chase transaction export and I'll also upload that template as well and show you how it's a bit different.
How to import transactions via the CSV Import:
-
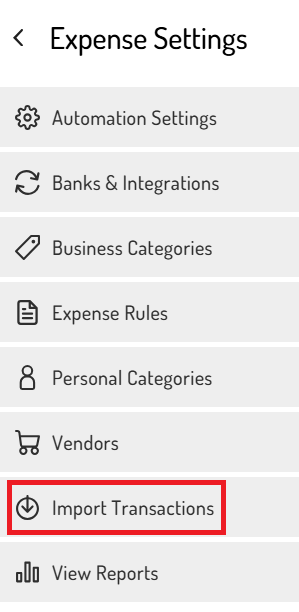
Navigate to the CSV Import feature (most Partners can access this by clicking the settings (gear) icon on the Expense or Income dashboard and then selecting 'Import Transactions').
- Select the Manually Tracked Account associated with the transactions.
- Manually tracked bank accounts are a way for you to clearly identify the name of the bank account for the transactions that you are importing. This is not required and if you do not create or select a bank account for these transactions they will show up as "Bank Account Operating" in your Balance Sheet.

- Manually tracked bank accounts are a way for you to clearly identify the name of the bank account for the transactions that you are importing. This is not required and if you do not create or select a bank account for these transactions they will show up as "Bank Account Operating" in your Balance Sheet.
- Upload the CSV file
- See the templates above in this same FAQ for examples
- Click ‘Next’.

-
Assign the columns from the spreadsheet by using the drop-down menu to map the data fields to the corresponding column headers in the CSV.
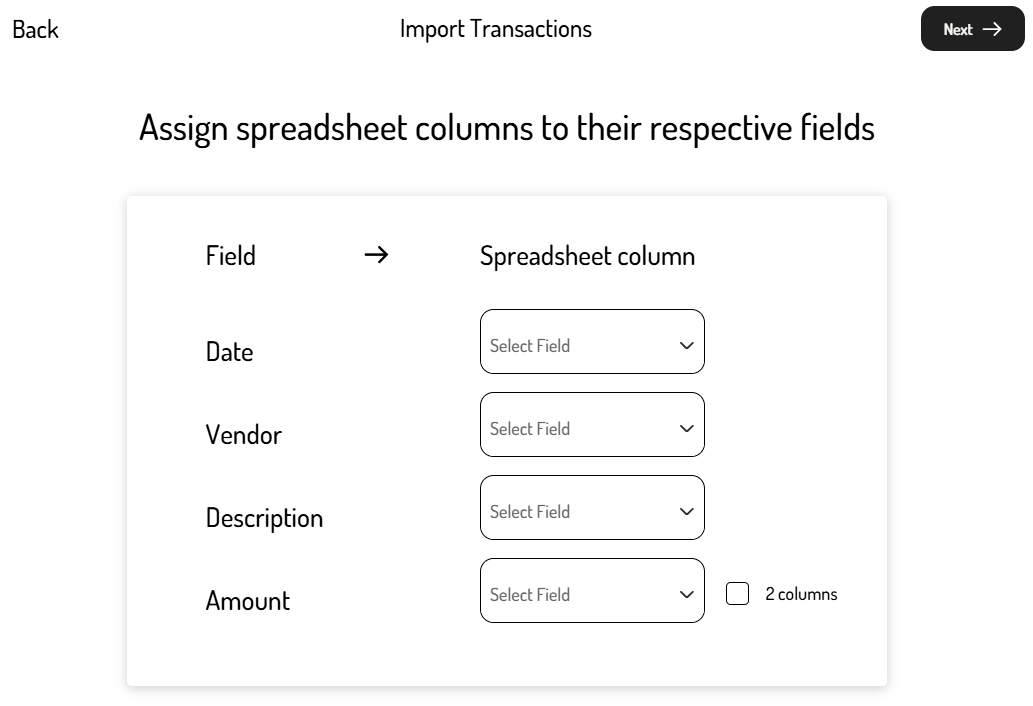
- If the file lists deposits and withdrawals in separate columns, check the ‘2 columns’ checkbox next to amounts. In the example template, it's set up with 2 amount fields: Expenses = Out and Income = In
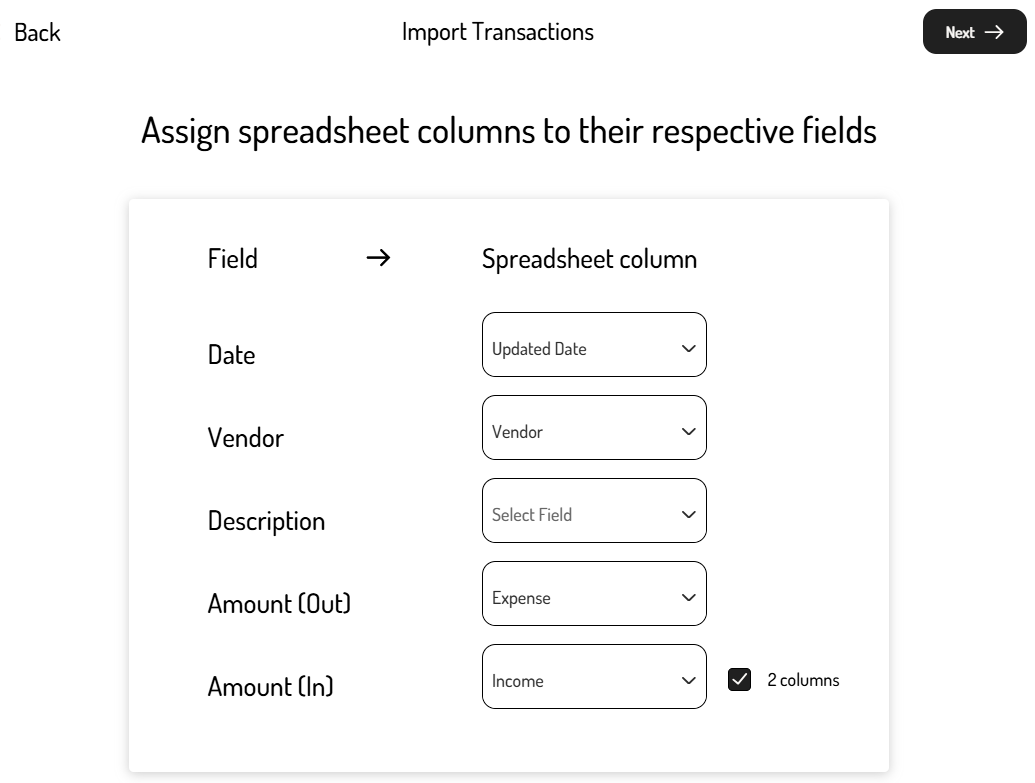
- If the file lists deposits and withdrawals in separate columns, check the ‘2 columns’ checkbox next to amounts. In the example template, it's set up with 2 amount fields: Expenses = Out and Income = In
- Click ‘Next’.
- On the overview page, review the transactions and deselect the checkbox next to any transactions that should not be imported. If the amount columns were mapped incorrectly, the withdrawals/deposits can be reversed.

- Once satisfied, click ‘Done’ to complete the import.
- A pop-up will confirm when the import is complete.
After the CSV file has been imported, navigate to the Transaction Dashboard to view or edit the imported transactions.
For more details, visit Expense Tracking with Money Pro.
Frequently Asked Questions
Can I import my bank transactions from a spreadsheet/CSV file?
Yes, Money Pro allows CSV imports when:
- Your bank or credit card isn’t supported for automatic linking.
- You need to import older transactions beyond what your bank provides.
- You prefer not to link your financial accounts and want to track transactions manually.
How do I prepare my CSV for import?
- Download the file from your bank or financial app.
- If available, choose the CSV format. If not, save the file as a CSV.
- Ensure your date format is one of the following:
- MM/DD/YYYY (e.g., 01/02/2025 for January 2, 2025)
- MM/DD/YY (e.g., 01/02/25 for January 2, 2025)
- Remove any extra or empty columns that may interfere with importing.
Can I undo a CSV import?
No, once an import is completed, it cannot be undone. However, you can delete imported transactions in bulk.